
Wijmo now supports Breeze.js, a JavaScript library that helps you manage data in client applications. This library allows you to store data in a relational database, query and save that data, and share that data across many screens of your JavaScript client. Breeze.js dynamically creates business data objects whose properties bind to UI controls. This allows the UI to update when the data model changes so that each object knows when it has changed and what has changed. You can also query in a JavaScript query language, save a single entity or a batch of entities, cache data on the client, and extend the model with custom methods, properties, and events.
Breeze.js works through an entity-oriented style of data management using the EntityManager to access and cache model data. The EntityManager functions as both a gateway to the backend persistence service and a cache of the entities you're working with locally. When you ask the EntityManager to execute queries or save pending changes, then the EntityManager builds the requests and handles the communications with the backend service.
For a full Breeze.js introduction, tutorials, documentation, and more, visit http://www.breezejs.com/home. In the following sample, you will use Knockout for data-binding and Breeze.js to manage the data. You can easily use Breeze.js with Wijmo by following a few simple steps:
To get started, take a look at the following sample that binds a wijgrid widget with Knockout and uses Breeze.js to manage the data. It will show you how to add references to the required files, create the ViewModel and EntityState, and create the markup.
In this example, we'll create a project that uses Knockout for data binding and Breeze.js to manage the data.
Add library references.
| References |
Copy Code |
|---|---|
<!--jQuery References--> <script src="http://code.jquery.com/jquery-1.11.1.min.js" type="text/javascript"></script> <script src="http://code.jquery.com/ui/1.11.0/jquery-ui.min.js" type="text/javascript"></script> <!--Theme--> <link href="http://cdn.wijmo.com/themes/aristo/jquery-wijmo.css" rel="stylesheet" type="text/css" /> <!--Wijmo Widgets CSS--> <link href="http://cdn.wijmo.com/jquery.wijmo-pro.all.3.20161.90.min.css" rel="stylesheet" type="text/css" /> <!--Wijmo Widgets JavaScript--> <script src="http://cdn.wijmo.com/jquery.wijmo-open.all.3.20161.90.min.js" type="text/javascript"></script> <script src="http://cdn.wijmo.com/jquery.wijmo-pro.all.3.20161.90.min.js" type="text/javascript"></script> | |
Add the Knockout extension references to your application.
| Knockout References |
Copy Code |
|---|---|
<!--Knockout JS Library--> <script src=http://cdn.wijmo.com/wijmo/external/knockout-2.2.0.js type="text/javascript"></script> <!--Wijmo Knockout Integration Library--> <script src= http://cdn.wijmo.com/interop/knockout.wijmo.3.20161.89.js type="text/javascript"></script> | |
| Breeze References |
Copy Code |
|---|---|
<!--Breeze.js References --> <script src="http://cdn.wijmo.com/external/q.js"></script> <script src="http://cdn.wijmo.com/external/breeze.min.js"></script> <script src=http://cdn.wijmo.com/interop/wijmo.data.breeze.3.20161.89.js type="text/javascript"></script> | |
Add some CSS styling.
| CSS Styling |
Copy Code |
|---|---|
<style type="text/css"> table { border-collapse: collapse; } table caption { font-size: 150%; } th, td { border: 1px solid #AAAAAA; text-align: center; padding: 0.5em; } th { background-color: #CCCCCC; } </style> | |
Create the ViewModel, the EntityManager, and the MetadataStore.
| ViewModel Script |
Copy Code |
|---|---|
<script id="scriptInit" type="text/javascript"> $.support.cors = true; function ViewModel() { var self = this; var dataService = new breeze.DataService({ serviceName: "http://demo.componentone.com/aspnet/NorthwindAPI/api/read", hasServerMetadata: false }); var ms = new breeze.MetadataStore(); self.manager = new breeze.EntityManager({ dataService: dataService, metadataStore: ms }); self.products = ko.observableArray(); self.load = function (query) { self.manager.executeQuery(query).then(function (data) { self.products(data.results); }).fail(function (e) { alert(e); }); }; </script> | |
Create and apply any specific queries, filters, or sorting functionalities.
| Sorting and Filtering |
Copy Code |
|---|---|
var allProducts = new breeze.EntityQuery("Product"); self.load(allProducts); this.filterBeverages = function () { self.load(allProducts.where("Category_ID", "eq", 1)); }; this.filterCondiments = function () { self.load(allProducts.where("Category_ID", "eq", 2)); }; this.sortId = function () { self.load(allProducts.orderBy("Product_ID")); }; this.sortPrice = function () { self.load(allProducts.orderBy("Unit_Price desc, Product_Name")); }; } | |
Apply and activate the Knockout bindings.
 $(document).ready(function () {
            vm = new ViewModel();
            ko.applyBindings(vm, $(".container").get(0));
        });
Create the markup.
| Markup |
Copy Code |
|---|---|
<body class="demo-single"> <div class="container"> <div class="header"> <h2>Data - Remote Data</h2> </div> <div class="main demo"> <!-- Begin demo markup --> <table> <tr> <th>Filter</th> <td> <button data-bind="click:filterBeverages">Beverages</button> <button data-bind="click:filterCondiments">Condiments</button> </td> </tr> <tr> <th>Sort</th> <td> <button data-bind="click:sortId">ID</button> <button data-bind="click:sortPrice">Price, Name</button> </td> </tr> </table> <table data-bind='wijgrid: { data: products }' /> </div> </div> </body> | |
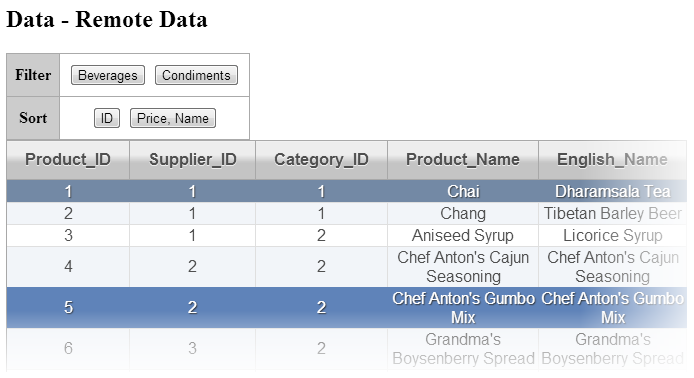
When you run your application, it resembles the following image.

Use the buttons above the grid to sort, filter, or modify the data.